

 I don’t remember building much LEGO furniture as a kid. I can’t say that it’s because I didn’t build many LEGO houses, because I did. I guess I just left my houses a little too empty in the furniture department. Granted, they were houses for wizards, pirates, and forestmen, but even a pirate needs a dining room table.
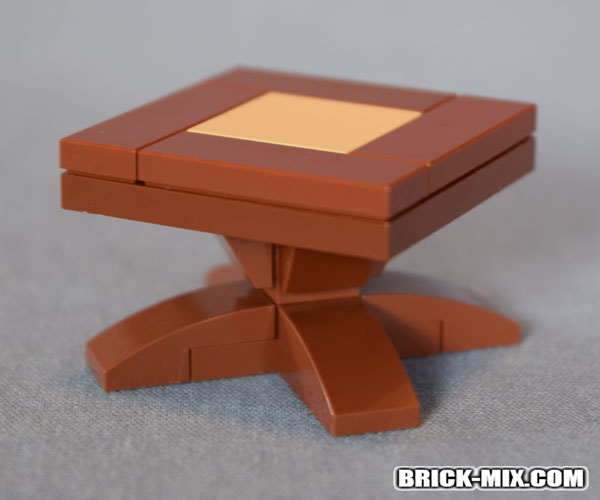
I’ve already posted a bookcase I made a while back. I was really happy with how it came out, and I guess that helped motivate me to make other furniture. Maybe I simply realized that if I’m ever going to fill a LEGO house with furniture, it’s going to take more than just bookcases. Without further ado, let me introduce me next venture into LEGO furniture: A sturdy little end table!
 There’s not really too much that goes into a table I suppose, but there are a couple of neat things about this build I’d like to point out. It started with my desire to use an unusual cross-shaped plate, Part 15397 as a base for it. That way I could easily have four feet extending from a 1×1 post. From there the 2×1 curved slopes coming off of it seemed like an obvious choice for the feet.
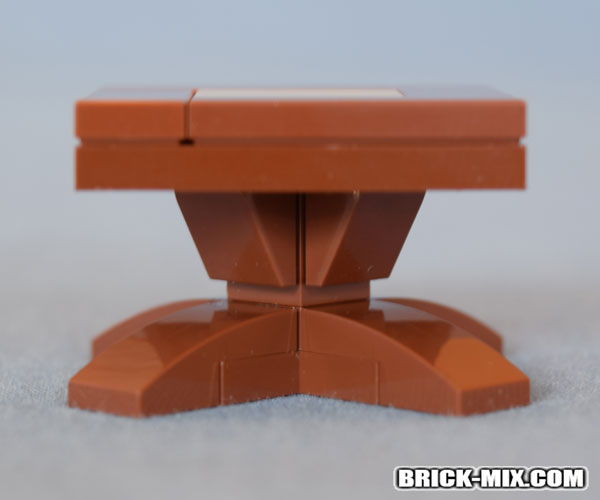
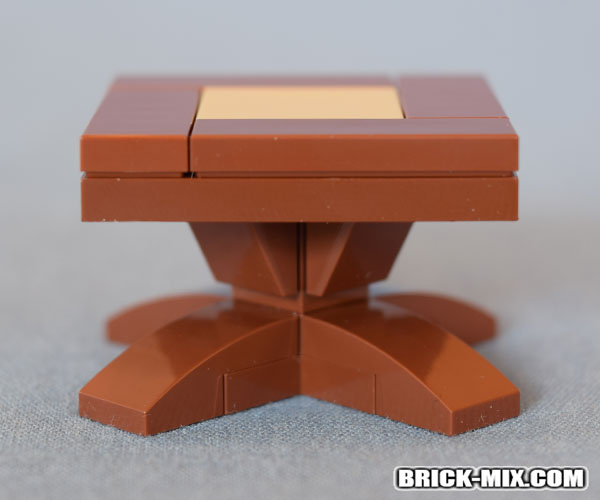
The middle post was originally just a 1×1 brick, but that looked uninteresting and unstable. Wanting to add more style and stability to it, I thought to use the always useful Part 4733 (a 1×1 brick with studs on all four sides) in conjunction with 1x1x2/3 little slopes to better support the tabletop. I was immediately happy with the result seen in the picture above.
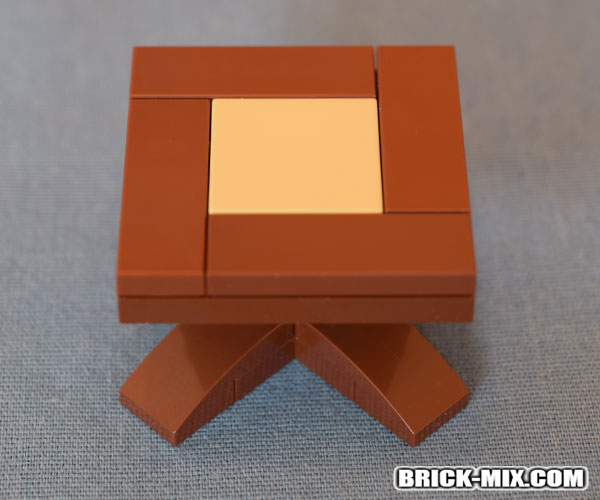 The tabletop is pretty basic. I wanted to do something a little more than just four 2×2 plates, so I stuck a 2×2 plate in the middle and surrounded it with 1×3 plates. I’m sure there’s a lot of other stuff you could do with it even from just a tile perspective but I like this simple little formation well enough.
Another thing I want to point out is that the table legs go to the corners instead of the middle of the sides. All I did was rotate the middle post 45 degrees and the end table suddenly looked twice as nice to me.
 And here’s the whole end table taken apart. You can better see the two interesting pieces I mentioned above that were used in the build, the cross plate and the 1×1 brick with studs on four sides.
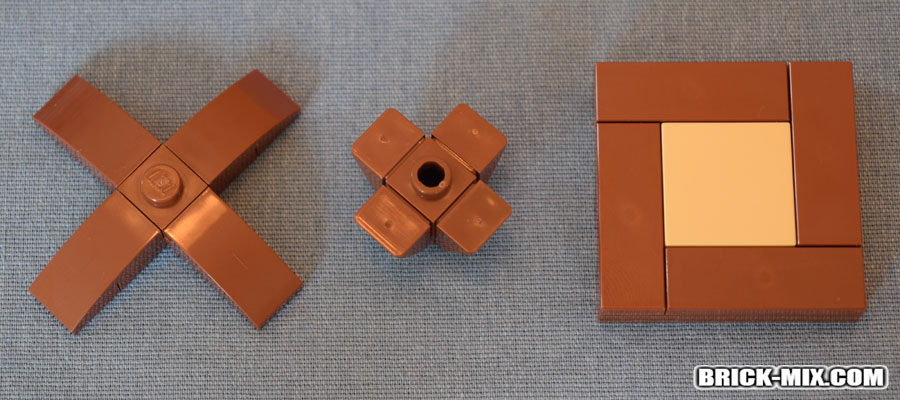 Here are the legs, the center tabletop support, and the tabletop itself all partially constructed. The 1×1 plate in the parts picture is on top of the middle of the cross plate on the left. Without it there’s not enough space for the little slopes that go on the super-studded brick to avoid hitting the curved slope feet.
 And here it is back together again! I know I say this about most my builds, but I’m very happy with how it came out. It looks very much like a piece of furniture I’d like to have in my own house. It’s simple and solid, but not without a little bit of class!
For once I don’t have a bunch of different colored versions of a build that could easily be dozens of different colors. I like the reddish brown color for most of it because it looks like wood, and I think the tan compliments it nicely. Still, if you’re interested in making one of these yourself there are certainly other options. You’re kind of limited by the cross plate if you want it to match the rest of it, since that piece only comes in a handful of colors. However, LEGO is making new colors of cool parts on a pretty regular basis, so it’s always worth keeping a look out for new color possibilities.
Should you want the LEGO Digital Designer file you can download it by clicking on the link below. If you just built a house for your minifigures and now they’re on the hunt for new furniture to fill it with I suggest you run this end table by them. Hopefully they’ll like it as much as I do!
![]() LEGO Digital Designer File for “End Table”
LEGO Digital Designer File for “End Table”
Pingback: Couch - Brick Mix
Pingback: Table Lamp - Brick Mix