

 For my first post I wanted to showcase something I’m especially proud of, and this “Fancy Car” seemed appropriate. I designed and built this a couple years ago, and every once in a while I see it on my shelf and think that it came together really well.
The seating area is LEGO Part 30149, which has been one of my favorite pieces since I got one in “Scorpion Tracker” (LEGO Set 5918). Despite the fact that it’s a piece that does a lot of the building work for you, which I generally shy away from, it worked really well here. I don’t get doors that open using the piece which is contradictory to form following function, a policy I heartily agree with, but in this case it didn’t bother me. Besides, with a car this awesome you don’t have time to open the doors, you just jump right in!
 Side view of the car. I think it looks pretty sleek, thanks to all those curves! You can best see the height and length of the car here. Though the height, length, and width are nearly too big for what I think a minifig should be driving around town, I believe they’re within reason, especially considering all the features on the car.
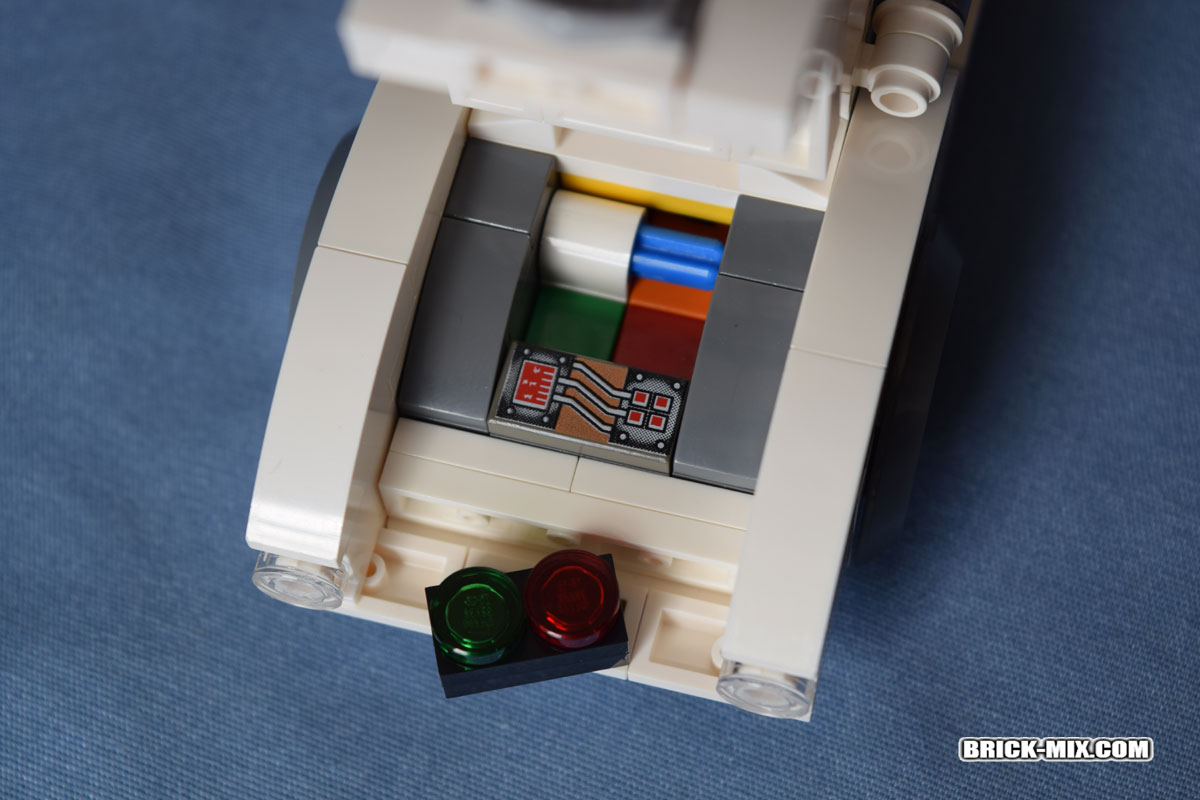
 The rear of the car with trunk, license plate, and tail lights. The tail lights are actually something I still think about changing. I’ve considered setting them in the same plane as the license plate by removing the 1×1 plates beneath the lights, but then the circular tiles look funny set in square recesses, and I don’t like the look of square lights.
I’ve also thought of putting the lights on either side of the trunk attached to the body of the car so there’s more space between them, like the headlights. The best way I thought of doing this is by switching out the 2×1 curved slopes in the rear (Part 11477) with a 2×1 straight slope (Part 92946) in such a way that you have the straight slope continuing the curve, and then the lights below, with either one or two 1×1 plates between the lights and Part 92946. I thought this kind of ruined the curve though, so I left it as it is.

 Hey, it opens up! You probably picked up on the hinges already. If one got past you until this point I’ll take that as a compliment. The car has an opening hood, trunk, and rumble seat behind the two front seats.
 The trunk. Not as much space as I’d like there to be back there, but it’s enough for a couple of tennis rackets or a small picnic. I thought about switching the engine to the rear and the trunk to the front so there would be more storage, but ultimately liked this better.
 The third, or “rumble” seat. This also took away from trunk space, but I’d rather be able to fit a third passenger than have more room in the trunk. There is the extra bit of storage in front of the seat for a map, which is thanks to Part 30149. I was worried that I wouldn’t be able to make it like I did if the top edge of the seat couldn’t get by 30149 to close properly, but thankfully it worked out perfectly.
This car was almost entirely designed before I built any of it, but this rumble seat is one of the things I had to physically put together during design to make sure it would actually work.

 The engine. Motor, I suppose, since I tried to design a little electric-looking deal. I’d prefer all cars in my town be electric, or I’ll eventually have to cover the place in brick-built smog, which is just a lot of extra work. The battery comes out, with colored pads beneath it so you know you put it in the right way. Before adding that color feature I put the battery in wrong a couple of times and the car wouldn’t go at all.
 Inside the car. A couple of subtle features here, such as the two small slope pieces for pedals and the stud next to the steering wheel to act as a keyhole or starter button, whichever you like. That white decorated tile with gauges, part 3069bp52, was my favorite printed piece as a kid so I’m glad it found a home in this fancy car. You also might notice the right mirror coming up closer to the seats than the left, which was done so the driver can actually see it.

 The seating in action. I like how the third seat in the rear puts the guy in the back centered, so he can see out the front easily, and higher than the other two. If I were a passenger in this car I think I’d rather sit in the back than front.
 I liked this model so much I built it four more times with different colors! As I said, I made the initial car years ago. The black version was made right after since I was using all black pieces to test some design stuff out anyway. After a while I felt like making a few more, hoping to see them all driving around a gigantic city someday.
The two-tone ones were something I liked when playing with colors in LEGO Digital Designer. I think the tan and dark gray one has an older feel to it and the dark red and black one looks like a newer kind of car, which is kind of funny considering all the pieces are the same. I suppose that’s an impact that colors can have.
And that’s it! The LDD file for my fancy car can be downloaded by clicking on the icon below. If anyone gets around to building one with modifications or different colors and wants to show it off I’d be happy to post it on this website. Also, if anyone has questions about my fancy car I’d be happy to answer them here. Happy building!
![]() LEGO Digital Designer File for “Fancy Car”
LEGO Digital Designer File for “Fancy Car”
Pingback: Scorpion Tracker Redux - Brick Mix